Dem bones, dem bones, dem fish bones! Part 1

At least that is what I think anyway.
I love this cane.
I hope you have fun making it too.
You will need:
Black Cernit
Opaque White Cernit
Porcelain Cernit
Biscuit Cernit
Clay slicing blade
Clay machine
Ruler if you wish
I mixed the black clay with Biscuit and the white clay with porcelain in equal parts
Condition and roll out the black in to a sheet on the thickest setting in your clay machine.
This is the last picture from part 1 here
Dem bones, dem bones, dem fish bones! Part 1

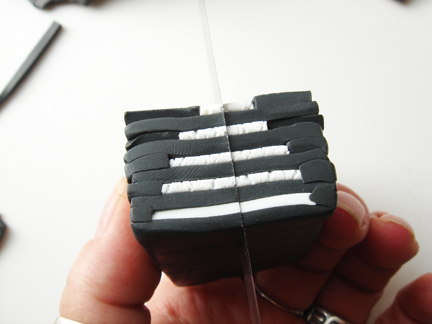
Put the stack back together with the white sheet in the middle...


Make the points of the triangle pretty sharp.

Trim the triangle black piece to fit the stack of rib bones.


Add a sheet of black clay rolled out on the thickest setting in the pasta machine to the bottom of the tail.

Like this!


Place a bamboo skewer or brass rod on the cut side of the big triangle on the top 1/3 of the triangle.
Press the rod gently in to the triangle.

Form the 2nd cut half around the rod to form a half circle cell in the both pieces of the triangle.

Roll a coil of black clay the size of the brass rod about 1/8" and place in the channel of the big part of the white triangle.
Cut off the black coil so it is the length of the white triangle piece.
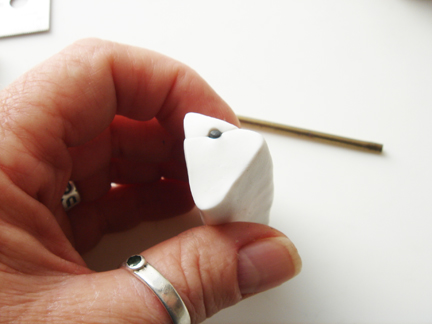
This will be the eye for the fish bone cane.


Pull off the small section while never changing the orientation of the pieces.

This piece will slide under the bigger white piece of the triangle, so the black strip will go along the outside edge of the small piece.


Place the triangle head in the center of the bones on the stack.


Place one half on each side of the head of the fish.

Reduce by compressing all sides one at a time with the palm of your hand and then flipping the cane from end to end and compressing all 4 sides of the cane again.
Repeat this slowly and gently until the cane is smaller by half the size.
It is best to be more forceful in the center of the cane to force the inside of the cane out.
As Katherine Dewey once told me "Oh, you are pressing on the "x" and the "y" axis which forces the "z" out through the center".
EXACTLY!

Enjoy and have a safe and fun Halloween!
Boos and hisses!